We've moved from Blogger to WordPress!

You should be automatically redirected in 5 seconds. If not, visit
http://blog.michaelfmcnamara.com
and update your bookmarks.

Thursday, May 1, 2008

Nortel WLAN 221x Handset Configuration

wlan_handset_2211_600x400 
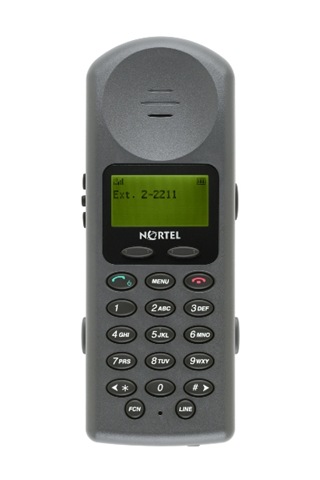
The purpose of this post is to outline how to properly configure a Nortel WLAN 2210/2211 Wireless Handset to connect over a wireless LAN to a Nortel Succession Call Server.

There is a cradle and software available to ease/speed the configuration but for this post we'll assume that we only have the phone itself and not the configuration cradle or additional software.

Note: If you are going to be supporting and/or installing dozens of these phones I would strongly suggest that you purchase the configuration cradle (you can download the software from Nortel's site).

In this example the Nortel 2211 WLAN phone will be configured to connect to a TN on a Nortel Succession 1000 v4.5 Call Server over a Motorola 5100 Wireless LAN Switch using WEP encryption. A Nortel 2245 Wireless Gateway is needed in order to connect to a Succession Call Server. Within the DHCP server a scope has been setup with the vendor class of “Nortel-221x-A” which will return the vendor specific DHCP options required by the Nortel WLAN phones.

With the wireless handset powered OFF, simultaneously press and hold the Power On / Start Call and Power Off / End Call keys.Release the Power On / Start Call key, then release the Power Off / End Call key. The first option on the Admin Menu displays.

Press the Up, Down, and Select side buttons, and the softkeys on the wireless handset to scroll through the menu options.

An asterisk (*) next to an option indicates that it is selected.

— Press the Up/Down buttons to display the previous/next menu items.
— Press the Select button to select the menu option or item.
  Alternatively, press the OK softkey to select the menu option or item.
— Press the Save softkey to save the entry.
— Press the Bksp key to backspace when editing the entry.
— Press the Up softkey to return to the previous menu level.
— Press Cncl to cancel the entry and return to the previous menu level.
— Press the Exit softkey to exit the menus.

The Admin menu should open with the following options below:

I.P. Addresses
0=Edit, FCN=Up

Scroll down the menu to the ESS ID option:

ESS ID
0=Edit, FCN=Up

Select “0” from this option to configure the ESSID value.

Current ESS ID:
Not learned yet

Scroll down this menu until the select displays “Static Entry” and select “0” to enter a value.

Enter the value proper ESSID of the WLAN you'll be trying to connect to, when finished select the Power Off/End Call button to SAVE

Select the “FCN” button to move back up a menu level.

Scroll down to the “License Mgmt” option

License Mgmt
0=Edit, FCN=Up

Select “0” to edit the license mgmt option and scroll through the option until you reach “010”.

Set Current [010]
0=Select, FCN=Up

Select the “FCN” button to move back up the a menu level.

Scroll down the menu to the “Security” options:

Security
0=Select, FCN=Up

Select “0” to enter the Security options and then scroll down until the following option appears;

WEP
0=Select, FCN=Up

Select WEP by entering “0” into the phone;

Authentication
0=Edit, FCN=Up

Select Authentication by entering “0” into the phone;

Open System
0=Select, FCN=Up

Scroll down until your reach the “Open System” option and select it by entering “0” into the phone. Proceed back up the menu be hitting the “FCN” button then scroll down the menu until you reach the “WEP On/Off” option, select “0”;

WEP On/Off
0=Select, FCN=Up

Scroll down the menu until the “WEP On” option appears as below and enter “0” to select this option;

WEP On
0=Select, FCN=UP

Key Information
0=Edit, FCN=Up

Default Key     1
Current Key:

Key Length
0=Edit, FCN=Up

128 bit
0=Select, FCN=Up

Key #1
Key #2
Key #3
Key #4           

Enter the Default Key number and actual WEP key for the ESSID you're trying to connect to. After this initial configuration the phone should connect to the WLAN and pull additional DHCP configuration options and should perform any firmware uploads if any are required.

***DO NOT POWER OFF THE PHONE WHILE THE FIRMWARE IS BEING UPDATED ***

Once the phone completes the upgrade it will reboot and should present a display similar to below;

Connect Svc
Node: _ _ _ _
TN: _ _ _ . _ _ . _ _ . _ _

OK  BKSp  Cler  Cncl

From here you’ll need to configure the node and TN information for this specific phone.


Cheers!

Wednesday, April 30, 2008

Windows Live Writer

image

As I've commented in the past I needed a tool that would allow me to better draft and layout my posts and articles. The default editor in Blogger is very nice for quick short articles but it becomes very cumbersome when the post starts to get long and has a lot of technical syntax. Formatting issues can also start to create problems which eventually lead to me (the author) spending more time cleaning up the post than actually writing the post.

This is a test post from Microsoft's Windows Live Writer (Version 2008).

I'm curious to see how much easier and efficient it will be using this tool as oppose to using the default editor in Blogger.

I'll also need to find a plug-in that allows me to include "code". Should it either be HTML, Perl, Javascript or CLI output from a network switch that needs special formatting.

Let's try this one...

************************************************** 
* Copyright (c) 1996-2006 Nortel Networks        * 
* All Rights Reserved                            * 
* Ethernet Routing Switch 1648T                  * 
* Software Release 2.1.0.0                       * 
************************************************** 
 
Login: 
 
CPU1 [05/16/01 17:05:59] SNMP INFO Sending Cold-Start Trap 
 
Login: rwa
Password: ***
  
ERS-1648T:1# 

I think that looks pretty good... Thanks Leo!

Cheers!

UPDATE: May 5, 2008

I was searching around the net looking for refine my blog site and maximize the value of the information that I was posting. I found the following post from Jeremey Martin detailing how to insert some JavaScript code to help highlight comments from the blog author. Thanks for the code Jeremy!

How to rlogin to a Nortel Call Server

In this post I'll explain how to remotely connect to a Nortel Succession Call Server 1000 (Meridian 1 Option11C, Option61C, Option81C) over the network. The Nortel Succession Call Server will obviously need to be connected to the network and you'll need to know the IP address or FQDN (Fully Qualified Domain Name). In the past Nortel has traditionally frowned against connecting the ELAN to a any large network (internal or external). You may want to configure some IP filters to protect the ELAN from any unnecessary traffic.

We'll be using PuTTY to rlogin into the Nortel Succession Call Server from our Windows XP desktop.

Note: you could use any operating system that supports rlogin using the parameters provided below.

Once you have PuTTY installed you’ll need to create a session, this is essentially a profile which can be stored for quick access later.

After installation you can run PuTTY from Start -> Programs -> PuTTY -> PuTTY

The example above is for the Nortel Succession Call Server v4.5 (formerly Meridian 1 Option81C PBX). The DNS name of the core CPU in the example above is "pbx-intf1".

Step 1. Enter the “Host Name” into the dialog box. (example; pbx-intf1.acme.org)

Step 2. Select the Protocol “Rlogin”

Step 3. Save the Session by giving it a name and clicking “Save”
(I usually use the FQDN for the session name making it easy to recall later)

Step 4. Click on the “Connection” text in the left menu tree.

After clicking the “Connection” tree you’ll see a window similar to above.

Step 5. Set the “Auto-login username” to “CPSID”

Step 6. Click on the “Rlogin” text in the tree menu to the left

Step 7. Set the “Local username” to “CPSID”

Step 8. Click on the “Session” text in the tree menu to the left.

Step 9. Click on Save to save the session configuration.

All you need to-do now is to click “Open” and PuTTY will establish an RLOGIN session with the Nortel Succession Call Server.


You will still need to log into the console using the “LOGI” command.

Cheers!

Tuesday, April 29, 2008

Multicast Routing Protocol (Part 2)

In part 1 of this post I looked at how to configure DVMRP to facilitate inter-VLAN Multicast commuications on a single switch. In this post I'll look at how to configure PIM to facilitate inter-VLAN Multicast communications across multiple switches and routers (Layer 3 switches).

I took a few minutes and threw together a quick diagram to help layout the topology (a picture is truly worth a thousand words). There are two core ERS 8600 switches (a switch cluster as Nortel likes to call it these days). There are three VLANs bridged across all four switches in the diagram, VLAN 55, 56 and 200. There is a fourth VLAN, 57, that is routed from ERS 8600 C. The ERS 5520 in the diagram will only be used as a Layer 2 even though it could potentially be used as a Layer 3 device (router).


I'm going to review two possible configurations. The first scenario will be for a client device (VLC Client A) in a VLAN routed by the core ERS 8600s. The second scenario will be for a client device (VLC Client B) in a VLAN routed by a closet ERS 8600.

Lets get on with configuring some ERS 8600 switches. First lets enable PIM globally;

ERS8600-A# config ip pim enable
ERS8600-A# config ip pim fast-joinprune enable
Then we'll enable PIM on the specific VLANs;
ERS8600-A# config vlan 55 ip pim enable
ERS8600-A# config vlan 56 ip pim enable
ERS8600-A# config vlan 200 ip pim enable
We need to create a CLIP interface to use for PIM routing, we don't want to tie the PIM routing to a physical interface in case that interface goes down for whatever reason. We're already using CLIP 1 for our OSPF router ID of 10.1.0.5/32.
ERS8600-A# config ip circuitless-ip-int 2 create 10.1.0.15/255.255.255.255
ERS8600-A# config ip circuitless-ip-int 2 ospf enable
ERS8600-A# config ip circuitless-ip-int 2 pim enable
We need to add a candidate Rendezvous Point Router (RP) pointing it to our CLIP address.
ERS8600-A# ip pim candrp add grp 239.255.1.1 mask 255.255.255.255 rp 10.1.0.15
We need to set the priority of the Bootstrap Router (BSR) for dynamic PIM routing.
ERS8600-A# ip pim interface 10.1.0.15 cbsrpreference 100
Then on the second core ERS 8600 switch;
ERS8600-B# config ip pim enable
ERS8600-B# config ip pim fast-joinprune enable
ERS8600-B# config vlan 55 ip pim enable
ERS8600-B# config vlan 56 ip pim enable
ERS8600-B# config vlan 200 ip pim enable
ERS8600-B# config ip circuitless-ip-int 2 create 10.1.0.16/255.255.255.255
ERS8600-B# config ip circuitless-ip-int 2 ospf enable
ERS8600-B# config ip circuitless-ip-int 2 pim enable
ERS8600-B# config ip pim candrp add grp 239.255.1.1 mask 255.255.255.255 rp 10.1.0.16
ERS8600-B# config ip pim interface 10.1.0.16 cbsrpreference 50
That's really all there is to configure with the two core ERS 8600 switches.

ERS5520 Switch (Edge)
In the case of the ERS 5520 switch there really isn't anything you need to configure per say. You could enable IGMP (generally disabled by default) to filter the multicast traffic from ports that are not subscribing to any multicast groups. Since the ERS8600s are performing the routing the ERS5520 acts just like a Layer 2 switch.

VLC Client A (10.1.56.50) should now be able to connect to the multicast group 239.255.1.1 from the ERS 5520 which will be sourced from the VLC Server (10.1.55.50).

ERS8600 C Switch (Edge)
In the case of the ERS 8600 switch (edge) you need to configure and enable PIM. We'll using VLAN 200 to interface with the upstream ERS8600 switches
ERS8600-C:5# config ip pim enable
ERS8600-C:5# config vlan 57 ip pim enable
ERS8600-C:5# config vlan 57 ip pim interface-type passive
ERS8600-C:5# config vlan 200 ip pim enable
Since there won't be any other Layer 3 PIM switches on VLAN 57 we set the PIM interface to passive (much like the OSPF equivalent of passive).

VLC Client B (10.1.57.50) should now be able to connect to the multicast group 239.255.1.1 from the ERS 8600 C which will be sourced from the VLC Server (10.1.55.50).

We can dump the multicast (PIM) routing table with the following command from the edge ERS8600 switch;
ERS8600-C:5# show ip pim mroute

================================================================================
Pim Multicast Route
================================================================================
Src: 0.0.0.0 Grp: 230.0.0.2 RP: 10.1.0.5 Upstream: 10.1.200.5
Flags: WC RP CACHE
Incoming Port: Vlan200-1/1,
Outgoing Ports: Vlan127-2/42,
Joined Ports:
Pruned Ports:
Leaf Ports: Vlan127-2/42,
Asserted Ports:
Prune Pending Ports:
Assert Winner Ifs:
Assert Loser Ifs:
TIMERS:
Entry JP RS Assert
151 1 0 0
VLAN-Id: 200
Join-P: 0
Assert: 0
--------------------------------------------------------------------------------
Src: 10.1.233.30 Grp: 230.0.0.2 RP: 10.1.0.5 Upstream: 10.1.200.5
Flags:
SPT CACHE SG
Incoming Port: Vlan200-1/1,
Outgoing Ports: Vlan127-2/42,
Joined Ports:
Pruned Ports:
Leaf Ports: Vlan127-2/42,
Asserted Ports:
Prune Pending Ports:
Assert Winner Ifs:
Assert Loser Ifs:
TIMERS:
Entry JP RS Assert
64 4 0 0
VLAN-Id: 200
Join-P: 0
Assert: 0
--------------------------------------------------------------------------------

Total Num of Entries Displayed 2
Flags Legend:
SPT = Shortest path tree, WC=(*,Grp) entry, RP=Rendezvous Point tree, CACHE=Kernel Cache, ASSERTED=Asserted, SG=(Src,Grp) entry, PMBR=(*,*,RP) entry, FWD_TO_RP=Forwarding to RP, FWD_TO_DR=Forwarding to DR, SG_NODATA=SG Due to Join, CP_TO_CPU=Copy to CPU, STATIC_MROUTE=Static Mroute, MRTF_SMLT_PEER_SG=Peer SG On Non-DR For SMLT
--------------------------------------------------------------------------------
Troubleshooting

Here are some basic commands that should help you troubleshoot any PIM issues;
ERS8600-A:5# show ip pim neighbor

================================================================================
Pim Neighbor
================================================================================
INTERFACE ADDRESS UPTIME EXPIRE
--------------------------------------------------------------------------------
Vlan55 10.1.55.6 31 day(s), 00:09:53 0 day(s), 00:01:40
Vlan56 10.1.56.6 31 day(s), 00:09:53 0 day(s), 00:01:40
Vlan200 10.1.200.6 31 day(s), 00:09:53 0 day(s), 00:01:34

Total PIM Neighbors = 3
We can see that all three VLAN interfaces have PIM neighbors with the ERS 8600 B switch. Lets just check the RPs and make sure we have the correct multicast groups (addresses).
ERS8600-A:5# show ip pim rp-set

================================================================================
Pim RPSet
================================================================================
GRPADDRESS GRPMASK ADDRESS HOLDTIME EXPTIME
--------------------------------------------------------------------------------
230.0.0.1 255.255.255.255 10.1.0.15 150 137
230.0.0.2 255.255.255.255 10.1.0.15 150 137
239.255.1.1 255.255.255.255 10.1.0.15 150 137
The multicast addresses of 230.0.0.1 and 230.0.0.2 listed above are used for Nortel's Contact Center (formerly Symposium Call Center software). Here's how we can list the candidate RPs;
ERS8600-A:5# show ip pim candidate-rp

================================================================================
Pim Candidate RP Table
================================================================================
GRPADDR GRPMASK RPADDR
--------------------------------------------------------------------------------
230.0.0.1 255.255.255.255 10.1.0.15
230.0.0.2 255.255.255.255 10.1.0.15
239.255.1.1 255.255.255.255 10.1.0.15
If we're dynamically choosing a RP we need to make sure that there is a BSR active;
ERS8600-A:5# show ip pim bsr

================================================================================
Current BootStrap Router Info
================================================================================

Current BSR address: 10.1.0.15
Current BSR priority: 100
Current BSR HashMask: 255.255.255.252
Current BSR Fragment Tag: 44590
Pim Bootstrap Timer : 31
I may need to update this article to make it cleaner and clearer.

Cheers!

Monday, April 28, 2008

State of the Blog

I thought I would spend a few minutes looking back at my adventure into the online digital world. I've been writing this blog for more than 6 months now and was curious if it's worth the time and effort and more importantly "is this information useful to anyone?"

It would seem, looking at the statistics from StatCounter.com that there are an average of 250 page loads daily during the week from 130 unique visitors (105 first time, 25 returning). I won't be making any fortune by rushing to sign-up for a Google Adwords account but that was never the intention.

I think the content has been good but certainly not great. I'm the first to admit that I'm not the best writer in the world (nor will I ever be). I have had quite a few very interesting and intriguing conversations with a number of different individuals. Some on the other side of the country and some on the other side of the pond (Atlantic Ocean).

I think we'll keep this blog going for another 6 months and then re-evaluate at that point. If you have suggestions for articles please post them as comments to this article.

Cheers!

Monday, April 21, 2008

IKARIAM - Live the ancient world!

I'm going to step out of my normal subject matter and blog about a game I just recently discovered on the Internet. I don't generally have too much time to play games but I'm not a complete book worm either. The game is called IKARIAM and is a free web-based game.

It's a massively multiplayer online (MMO) game in the same genre as Sid Meier's Civilization and built completely around Javascript with some very nice graphics. It can be monotonous for some but it's also a very easy game that is played in real-time. It provides a nice balance of action and strategy and was truly fun to play. It appealed to me in that I could spend just a few minutes every day (or every few days) and enjoy it just as much if I had spent a few hours playing it.

What was just as interesting was the enormous support for Ikariam within the Greasemonkey community. Greasemonkey is a Mozilla Firefox extension that "allows users to install scripts that make on-the-fly changes to most HTML based web pages". I personally use a number of Greasemonkey scripts that really enhance my web browsing activity.

If you're feeling stressed out and have a few minutes to waste I would highly suggest you make your way over to IKARIAM, you'll probably feel like a little kid again -- or perhaps like the emperor Julius Caesar!

Cheers!

UPDATE: May 2, 2008

I'd like to thank ecmanaut for his hard work. Here's the link to his Kronos Utils project on Google Code;
http://ecmanaut.googlecode.com/svn/trunk/sites/ikariam.org/kronos-utils/kronos_utils.user.js
And don't forget his two other scripts;
http://ecmanaut.googlecode.com/svn/trunk/sites/ikariam.org/ikariam_friend_list.user.js
http://ecmanaut.googlecode.com/svn/trunk/sites/ikariam.org/ikariam_score_linker.user.js

Cheers!

Update: May 21, 2008

Here are some additional links to the Kronos Utils for Ikariam;
http://code.google.com/p/ecmanaut/source/list
http://corentin.jarnoux.free.fr/kronosutils/index.php

Cheers!

Friday, April 11, 2008

Wireless LAN Vendors

Thanks to everyone that participated in the poll, "What vendor are you using for your wireless LAN?". It's only to be expected that more folks responded with Motorola since I have a few articles dedicated to the Motorola Wireless LAN Switches posted on this blog.

Wireless networking has definitely brought its own set of distinct challenges. Channel and power management are among the too big problems with wireless networking. And let's not forget the whole security issue with WEP, WPA and WPA2. Interoperability issues can also create a lot of headaches. And the never ending discussions over which band is better, the 2.4Ghz (802.11b/g) or 5Ghz bands (802.11a).

What vendor are you using for your wireless LAN?

Aruba
4 (9%)
Cisco
6 (14%)
Extreme
0 (0%)
Motorola
15 (36%)
Muru
3 (7%)
Trapeze
6 (14%)
3Com
0 (0%)
Other
8 (19%)

Thanks for the feedback!

Cheers!