In this post I'll review how to configure a Nortel VPN Router (formerly Contivity Switch). You'll need a special RJ45 -> DB9 serial cable in order to connect to the console port of the VPN router. The default username is "admin" while the default password is "setup". If your not  working with a brand new device, right out of the box, I would suggest that you factory reset. You can do that from the main menu by selecting the "R" for "Reset System to Factory Defaults".
Welcome to the Contivity Secure IP Services Gateway
Copyright (c) 1999-2004 Nortel Networks, Inc.

Version:                 V05_00.136
Creation date:           Aug 20 2004, 15:50:15

Date:                    07/23/1980
Unit Serial Number:      11221

Please enter the administrator's user name: admin

Please enter the administrator's password:

Main Menu:  System is currently in NORMAL mode.
  1) Interfaces
  2) Administrator
  3) Default Private Route Menu
  4) Default Public Route Menu
  5) Create A User Control Tunnel(IPsec) Profile
  6) Restricted Management Mode       FALSE
  7) Allow HTTP Management            TRUE
  8) Firewall Options
  9) Shutdown
  B) System Boot Options
  P) Configure Serial Port
  C) Controlled Crash
  L) Command Line Interface
  R) Reset System to Factory Defaults
  E) Exit, Save and Invoke Changes

Please select a menu choice (1 - 9,B,P,C,L,R,E):
The first step will be to configure the IP addressing for the private LAN and WAN interfaces. Using the serial console select "L" for "Command Line Interface" from the menu options.
CES>
Upon entering the CLI interface the prompt will be changed to "CES>". You must now enter the privledged mode using the "enable" command entering the default admin password of "setup".
CES> enable
Password: *****
Let's take care of the easy stuff first;
CES#clock timezone est
CES#clock set 16:45:00 24 FEBRUARY 2008
You can discern from the syntax above that #clock set
. Now you must enter configuration mode using the commands listed below;
CES#configure terminal
Enter configuration commands, one per line. End with Ctrl/z.
CES(config)#
CES(config)#adminname admin password
We’ll first configure the private LAN IP Address (10.101.203.1/24);
CES(config)#interface FastEthernet 0/1
CES(config-if)#ip address 10.101.203.1 255.255.255.0
CES(config-if)#exit
Next we’ll configure the MANAGEMENT IP Address; (they must be on the same subnet!)
CES(config)#ip address 10.101.203.10
Management address set to 10.101.203.10 successfully !
Next, make sure Mgt addr and private LAN addr are on same subnet
CES(config)#
You should use the IP addressing that’s been assigned to the equipment your configuring in place of the IP addressing used above. Next we’ll assign the public WAN IP Address provided by the Internet Service Provider (ISP). We'll using 192.168.100.100/24 for this example along with 192.168.200.50 and 192.168.200.51 as DNS servers ;
CES(config)#interface FastEthernet 1/1
CES(config-if)#ip address 192.168.100.100 255.255.255.0
%Warning: The IP address type is changed from DHCP dynamic to static
CES(config-if)#exit
CES(config)#ip default-network 192.168.100.1 public
CES(config)#ip name-server 192.168.200.50 192.168.200.51
NOTE: FastEthernet 0/1 is the PRIVATE LAN while FastEthernet 1/1 is the PUBLIC WANLet’s disable those services we won’t be using and enable those we will be using;
CES(config)#no tunnel protocol pptp public
CES(config)#no tunnel protocol pptp private
CES(config)#no tunnel protocol l2tp public
CES(config)#no tunnel protocol l2tp private
CES(config)#ipsec encryption 3des-sha1
CES(config)#ipsec encryption aes256-sha1
CES(config)#no ipsec encryption aes128-sha1
CES(config)#no ipsec encryption des40-md5
CES(config)#no ipsec encryption des40-sha1
CES(config)#no ipsec encryption des56-md5
CES(config)#no ipsec encryption des56-sha1
CES(config)#no ipsec encryption hmac-md5
CES(config)#no ipsec encryption hmac-sha1
Let’s configure the “Base” default Branch Office Group with the standard settings. We will use 3DES-SHA1 for the main encryption with 3DES-Group2 for the IKE.
CES(config)#bo-group ipsec /Base
CES(config-bo_group/ipsec)#encryption 3des-sha1
CES(config-bo_group/ipsec)#encryption ike 3des-group2
CES(config-bo_group/ipsec)#antireplay enable
CES(config-bo_group/ipsec)#no compress
CES(config-bo_group/ipsec)#initial-contact enable
CES(config-bo_group/ipsec)#exit
Let’s add a designator for the local network (to be used later – replace with your IP network)
CES(config)#network add LocalNetwork ip 10.101.203.0 mask 255.255.255.0
Let’s add a sub group for our IPsec tunnel configuration call NortelVPN;
CES(config)#bo-group add /Base/NortelVPN
CES(config)#bo-conn add TestProfile /Base/NortelVPN
CES(config)#bo-conn TestProfile /Base/NortelVPN
CES(config/bo_conn)#conn-type peer2peer
CES(config/bo_conn)#local-endpoint 192.168.100.100
CES(config/bo_conn)#remote-endpoint
CES(config/bo_conn)#tunnel-type ipsec
CES(config/bo_conn)#ipsec authentication text-pre-shared-key password987
CES(config/bo_conn)#routing type static
CES(config/bo_conn)#state enable
CES(config/bo_conn)#routing static
CES(config/bo_conn/routing_static)#local-network LocalNetwork
CES(config/bo_conn/routing_static)#remote-network 0.0.0.0 mask 0.0.0.0 state enable cost 1
CES(config/bo_conn/routing_static)#exit
CES(config)#no service dhcp enable
CES(config)#ip default-network 192.168.100.1 public
CES(config)#ip dhcp-relay 10.101.203.1
CES(config)#ip dhcp-relay 10.101.203.1 enable
CES(config)#ip helper-address 10.101.203.1 server 1
CES(config)#ip forward-protocol dhcp-relay
Now we’ll need to configure certificate services for our SSL certificate in order to perform remote management via SSL over HTTPS;
CES(config)#crypto password somepassword
In the command above we used “somepassword” as the password for the certificate keys.
CES(config)#crypto server request
CES(config-request)#name NortelVPN-1050
CES(config-request)#country US
CES(config-request)#locality Somewhere,US
CES(config-request)#org-unit "Information Services"
CES(config-request)#organization "Acme Inc."
CES(config-request)#state AZ
CES(config-request)#key 3
ES(config-request)#openSSL enable
CES(config-request)#
CES(config-request)#create
-----BEGIN CERTIFICATE REQUEST-----
MIIBJjCB0WidjxSxXjsQIBADBsMQswCQYDVQQGEwJVUzELMAkGA1UECBMCUEExDzANBgNVBAcTBkJlcnd5bjEgMB4
GA1UEChMXTWFpbiBSHXJWKqMaW5lIEhlYWx0aCBTeXN0ZW0xHTAbBgNVBAsTFEluZm9ybWF0aW9uIFNlcnZpY2
VzMFwwDQYJKoZIhvcNAQEBBQADSwAwSAJBALg+8o2dMLT47w3vdf8taNKbnizdTk+d7WT9CdNE9wRC8
wo41zie2oT+l8SmNKLnZIjRBS8e13j4kxWVMQodkqqM/1vGWoq0m2qBcCAwEAAaAAMA0GCSqGSIb3DQEBBAUAA0EAOsF9
RxKcp0CBfICIK/VYppWk9s7BjiLCqcAZ5aKYDsmRJMNUj6cw/u9EZwHZj0xWXj+wj8ME+lXh+KZ24Hg
dgg==
-----END CERTIFICATE REQUEST-----
CES(config-request)#
At this point you’ll need to take the CSR request and get it signed. You’ll then need to upload via FTP the root CA certificate along with the signed CSR certificate back to the Contivity switch. You should place the files in \system\cert\import the issue the following commands;
CES(config)#crypto ca import rootca.crt
CES(config)#crypto server import signed.crt
Note: If you get a “% RSA: Unknown operation for key type.”, then uncheck the Key Usage Extention Required, under system, certificates, certificate configuration in the GUI.
In the example above both “rootca.crt” and “signed.crt” are the filenames of the signed certificates.
CES(config)#show crypto ca certificates
CA Certificate:
----------------------------------------------------
Subject DN : mail=hostmaster@acme.org, CN=Contivity Root CA, OU=Information Services, O=Acme Inc, L=Somewhere, ST=Arizona, C=US
Trusted : ENABLED
Enabled : ENABLED
Default Group : /Base
Validity : 12/10/2004 - 12/08/2014
CES(config)#show crypto server certificates
Certificate:
----------------------------------------------------
Subject DN : CN=CES-SSL, OU=Information Services, O=Main Line Health System, L=Berwyn, ST=PA, C=US
Trusted : ENABLED
Validity : 01/13/2005 - 01/11/2015
With the full DN above we can now configure the server certificate to use for SSL (HTTPS) management;
CES(config)#ssl server-cert “CN=NortelVPN-1050, OU=Information Services, O=Acme Inc, L=Somewhere, ST=AZ, C=US”
CES(config)#ssl https-port 10443
CES(config)#ssl cipher all
CES(config)#https public
We’re still working on finishing the rest of the document……
This command enables and disables the audible alarm that is sounded on the
switch under certain error conditions.
CES(config)#no audible alarm
At this point you should reboot the Nortel VPN router from main menu (you can get back to the main menu by type "exit" at the CLI interface prompts).
Once the Nortel VPN router (both the larger 1700, 2700s and the 1010, 1050, 1100s take about 5 minutes to boot up so please be patient) has booted up there will be a green light ont he right switch of the router labled as "G: ready". You should now be able to cable up to one of the LAN Ethernet ports with a PC. You should be able to open a web browser to the management IP address;
http://10.101.203.10
You should be able to check the status of the VPN tunnel through the GUI. You will of course also need to configure the main office VPN router before the tunnel will connect.
Cheers!
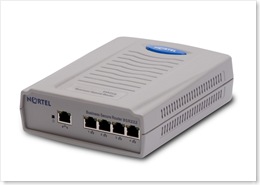 "The Business Secure Router 222, specifically designed for the small to medium business (SMB), is a converged broadband access router that provides a secure connection to the Internet via digital subscriber line (DSL) or cable modem broadband services. The Business Secure Router 222 is an advanced, feature-rich router offered at an affordable price."


